One of my favorite IDE is VSCode. What I love about it is how
extensible the software is. There are extensions for many platforms. I also enjoy how lightweight the software is - it is usually the first thing I install on my personal computer.
Some of the languages are straight forward on how to install and start debugging. C# can be a little tricky if you haven’t had much experience in VSCode, dotnetcore, and git before. Therefore I wanted to create a quick walk through so you can start using C# in a modern IDE and start practicing your leetcode, tackling your homework, or work on your next production application.
Setup GIT
I am going to start by created a GitHub repository for this project. I recommend signing up for GitHub as it is one of the industry’s best practices to share code online. Once you have your github account setup, create a new repository.
Setup your code repository - create a public repo and call it whatever
you want.
Download and Install VSCode Software
VSCode : https://code.visualstudio.com/
DotNetCore : https://dotnet.microsoft.com/download
(click download the .NET Core SDK)
Git : https://git-scm.com/
Go through the installers and you can click the default settings. That
should be enough for the Pre-Reqs
Clone your Repository
Open PowerShell. I usually create a directory with all my source.
Something like c:\source
New-Item -ItemType Directory -Force -Path C:\source
cd c:\source

Git clone "https://github.com/udubnate/blog-resources" (Note: put your repo in the quotes - right now it is staged to my repo)
Cloning into 'blog-resources'...
remote: Enumerating objects: 3, done.

Cd c:\source\blog-resources (or the new of your repo)
Couple more git commands. Create a new branch for your personal use. How about Csharp name for a branch?
Git checkout -b csharp
Switched to a new branch 'csharp'
Now the dotnet fun, create a dotnet project and open vscode
Dotnet new console -n MyFirstApp

Cd ./MyFirstApp

Code .
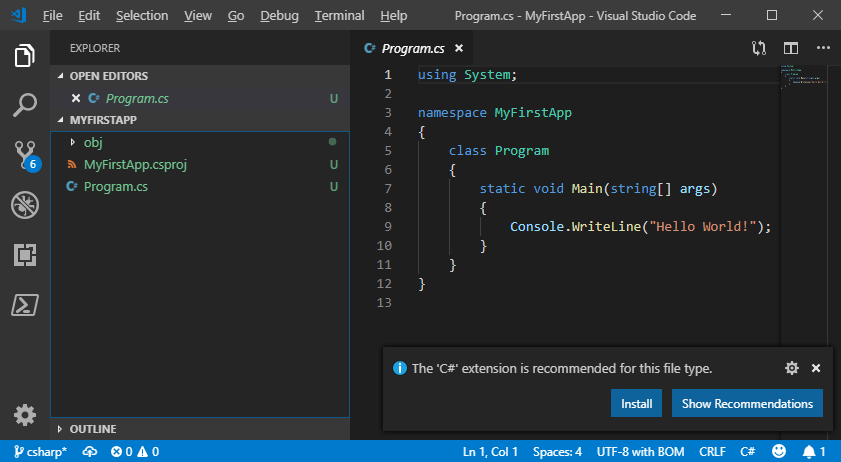
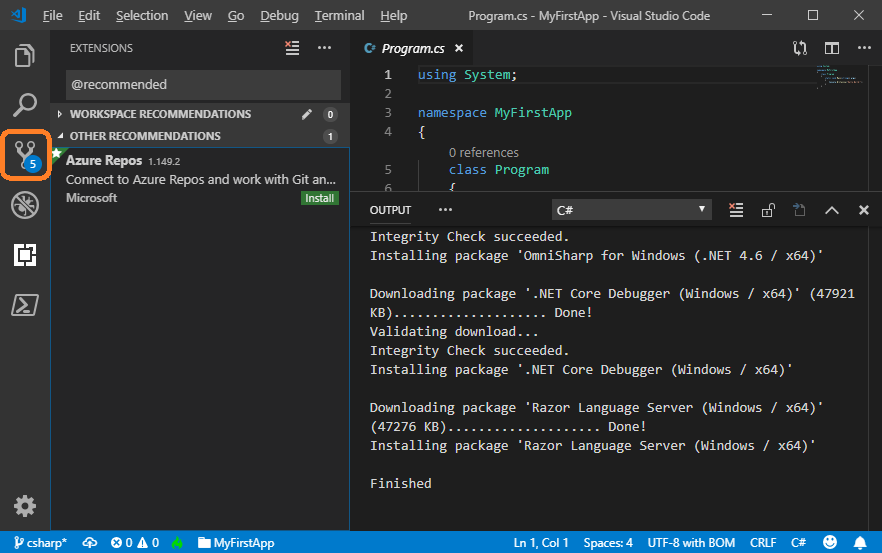
There will be a prompt to install the C# extension (as shown above), click Install
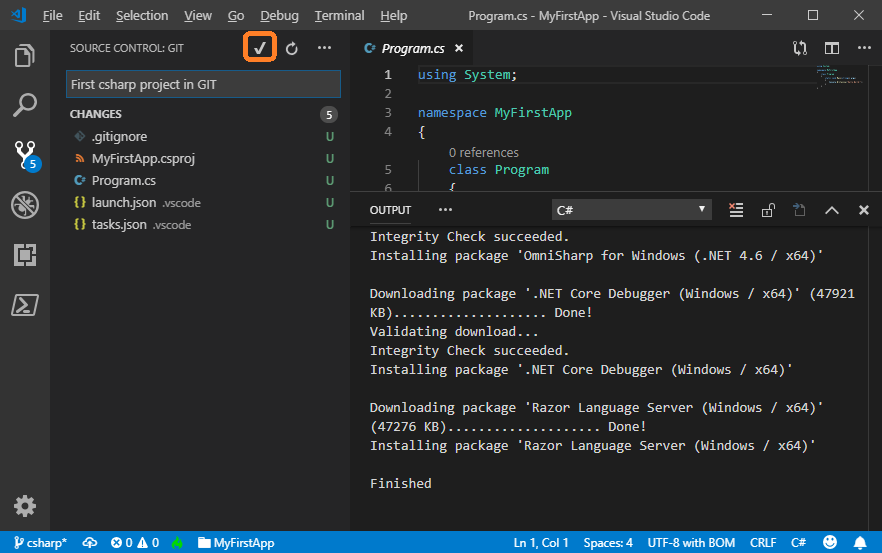
Now click the source code button in vscode marked by the orange box
Next step is to type a comment and then click the check box in the
orange box, click Yes to confirm
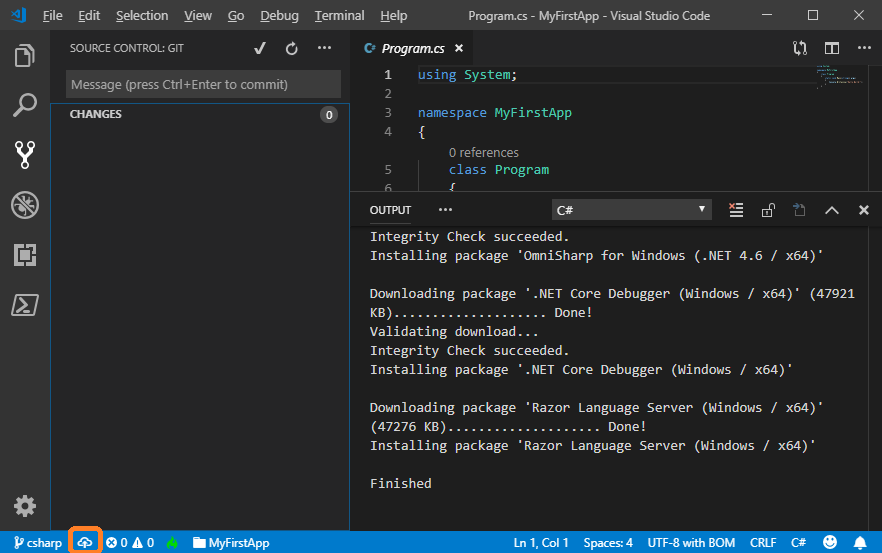
You’re done! Well not quite yet. GIT is synced but only to your local machine. To sync your branch to the cloud (github), click this well marked button at the bottom of the page. It might ask if you would periodically run ‘git fetch’ - select Yes. (Just makes it easier to manage incoming/outgoing commits)
VSCode Debugging
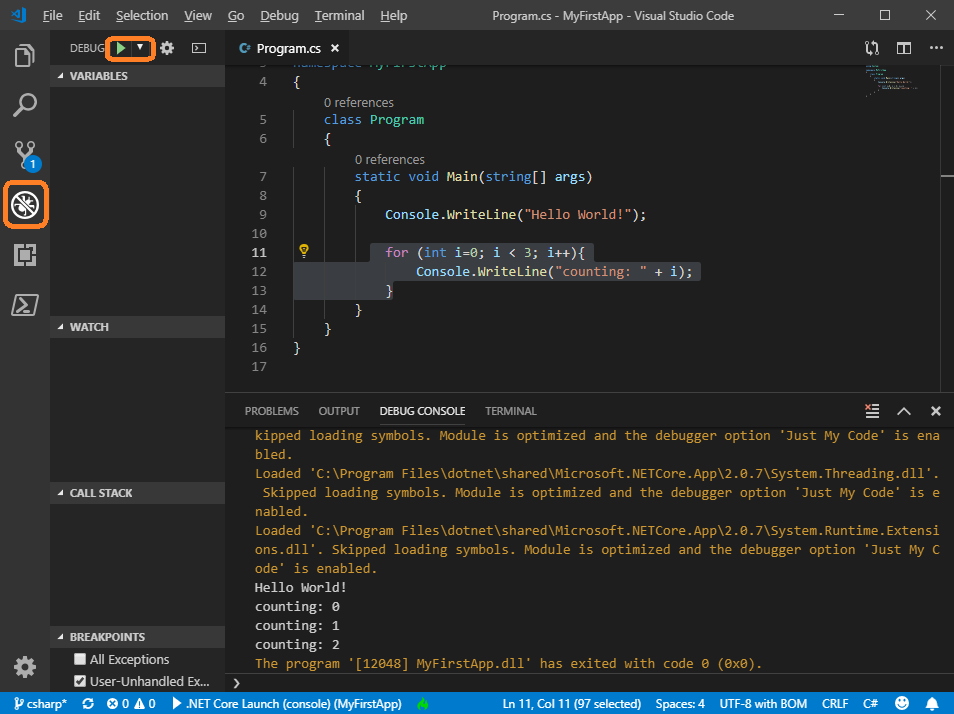
Now that you have the code saved in source you can make your edits to your app. Next step is to run the code through a debugging environment. Click the bug button to enter the debugger. I added some code, let’s click play and let it run.
Code:
for (int i = 0; i < 3; i++){
  Console.WriteLine("counting: " + i);
}
Another great thing you can do is set breakpoints and walk through
your code. To set a breakpoint click left of the line number in your code. For example: click left of line 12. then click the play button again
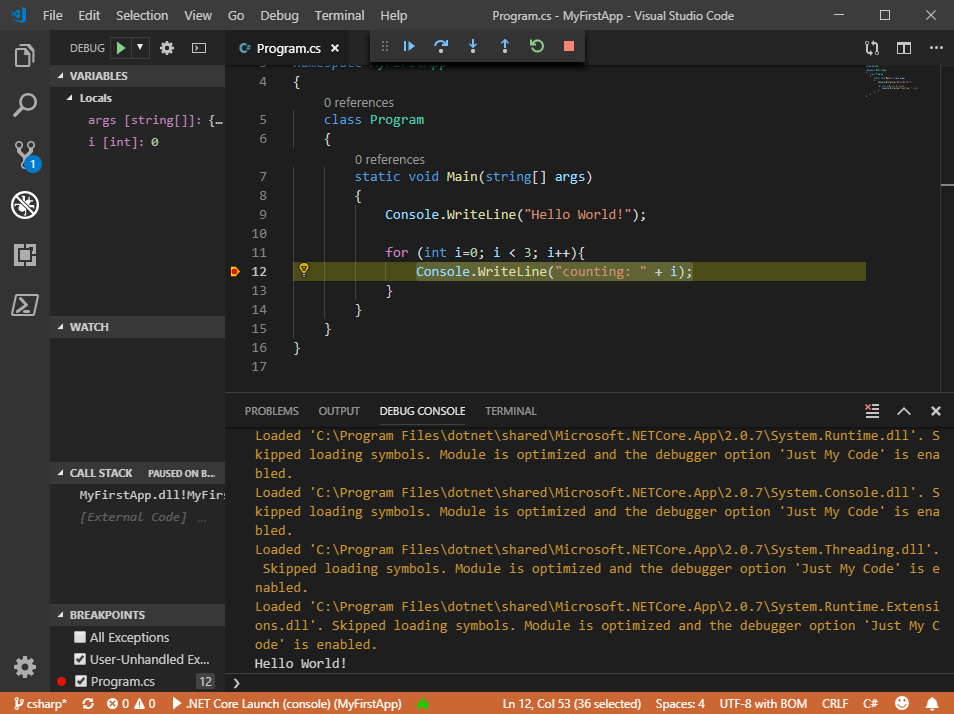
Now you can walk through the for loop and see the current values of the variables setup on the left. You get all the rich functionality you had in Visual Studio but a much lighter, more modern version.
Hope you enjoyed the post, give me feedback on twitter. Please share
with your friends if you have found this useful.
Some good reference material
- 6 commands you need
to know to work with Git - https://thomasrayner.ca/first-git-commands/ - .Net Core Guide - https://docs.microsoft.com/en-us/dotnet/core/